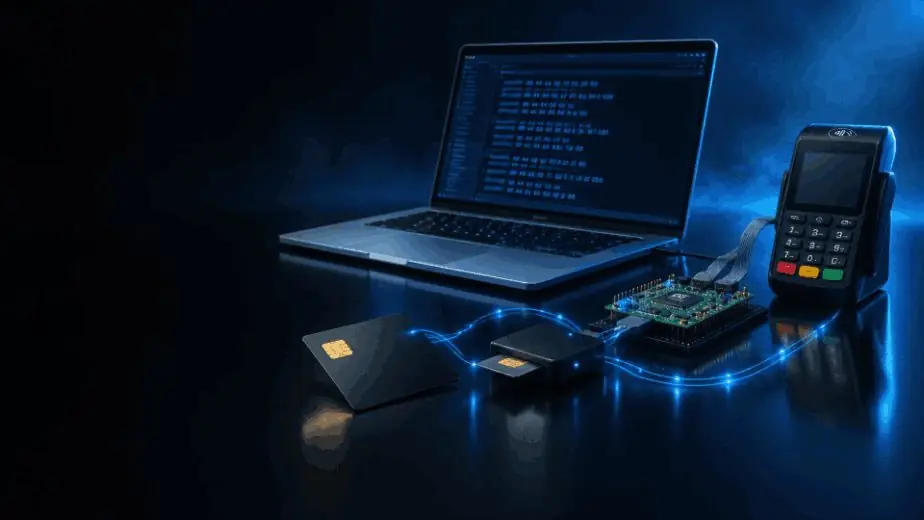
APDU Simulator
Emulate an EMV card, drive a real one, or push a card profile to an STM32 board any terminal can read — with every APDU formatted and raw, a trace of the whole session, and scripted test plans from SELECT PSE to GENERATE AC.
On this page
Overview
The APDU Simulator is the card side of an EMV transaction. It holds a card profile — ATR, applications, records, issuer keys — and answers the terminal’s commands from it: SELECT, GET PROCESSING OPTIONS, READ RECORD, VERIFY, GENERATE AC. That card can run in-process, be pushed to an STM32 board that presents a physical contact card to any terminal, or step aside while Studio drives a real card through a PC/SC reader.
Every exchange is shown formatted and raw as it happens, kept in the session trace, and checkable against a scripted test plan.
apdu-simulator · Card Session — Connect, then a contact purchase from SELECT PSE to GENERATE AC — each command parsed to labelled TLV beside its raw hex, the ARQC coming back in the last response
SELECT PSE to GENERATE AC.Configuration tabs
APDU Simulator Configuration has five tabs. Each card links to the section that documents it.
Quick Start
- Create a card profile — Open
APDU Simulatorand add a profile in the left rail, or keepMasterCard Debit (Test). - Pick the mode — On Mode & Transport choose Loopback, Reader (PC/SC) or Card emulator (USB-CDC to STM32). Loopback needs no hardware.
- Pick the transport — For the card emulator, select the port the firmware enumerated on (
cu.usbmodemXXXXon macOS) and leave the baud at115200. - Check the profile — Card Profile shows the ATR, AID, PAN and issuer keys the simulator will present; Clone & personalize to change them.
- Launch — Launch APDU Simulator opens the session window. Connect, then present the pinboard to the terminal — or run a test plan in loopback.
- Read the exchange — Every APDU lands in the four panes, formatted and raw; Trace Log keeps the whole session.
Mode & Transport Tab
Pick the role this simulator plays. The transport section below adapts to it.
apdu-simulator · Mode & Transport — the three operating modes, Card emulator selected, and the STM32 transport — port, baud rate and ATR override
Operating modes
| Mode | What happens |
|---|---|
| Loopback (software-only) | EMV runtime in-process against the active card profile. No hardware. Ideal for developing test plans and personalization. |
| Reader (PC/SC) | Studio acts as the terminal and drives a physical card through a PC/SC reader such as the ACS ACR39U-I1. The card profile is informational only — the real card is the source of truth. |
| Card emulator (USB-CDC to STM32) | Studio pushes APDU responses to the Nucleo-L432KC firmware over USB-CDC. The firmware emulates a contact card on the XCRFID pinboard, readable by an external POS terminal. |
- Reader (PC/SC) — any PC/SC contact reader, for example an ACS ACR39U-I1.
- Card emulator — an ST Nucleo-L432KC, an XCRFID 4-in-1 SIM/smart-card pinboard, a USB micro-B cable, and a 3V3↔5V level shifter such as a TXS0108E if your terminal drives Class A 5 V cards.
firmware/stm32-card/ in the repository: the C source, its PlatformIO project, the full bill of materials and the C1–C8 wiring table from the Nucleo to the ISO 7816 contacts. If you would rather have the board design than a parts list, open an issue and ask for it.Transport — STM32 / USB-CDC
115200 by default. The framing is binary, so the baud only affects throughput, not the protocol./dev/cu.usbmodemXXXX after the firmware boots. If it is missing, check the Firmware tab of the session window — the board may still be in DFU mode.Card Profile Tab
The simulator emulates the active profile when running. The tab shows the key fields; the full editor opens from Edit profile.
apdu-simulator · Card Profile — the active profile, MasterCard Debit (Test), and its summary — scheme, ATR, the first application and the issuer key it signs with
3B6500002063CB6800 for the Mastercard test profile. Mode & Transport can override it per port.READ RECORD — CDOL1 and CDOL2, the CVM list, issuer action codes, application usage control and the rest of the application data.TDES_AC, TDES_SMI, TDES_SMC) the card derives its UDKs from, referenced by id such as mc-imk-1.Actions
- Edit profile — opens the full editor for the active profile — every tag, record and key.
- Clone & personalize — copies the profile and steps through PAN, expiry, name and keys so a test card becomes yours.
- New blank — starts an empty profile.
- Refresh — re-reads the profile list from disk after an import.
The Other Configuration Tabs
Terminal Profile Tab
When Studio plays the terminal — in loopback and reader modes — this profile is what the card sees: the PDOL and CDOL data it is answered with, the CVMs the terminal supports, and the action codes that decide offline, online or decline.
apdu-simulator · Terminal Profile — identity, capability bytes with their decoded meaning, floor limit and action codes, and the AIDs the terminal accepts
| Tag | Field | What it sets |
|---|---|---|
9F35 | Terminal type | 22 — attended, online capable, operated by the merchant. |
9F33 | Terminal capabilities | Card data input, CVM and security capability bytes — which CVMs and which offline data authentication the terminal claims. |
9F40 | Additional capabilities | Transaction types, input and output capabilities. |
9F1A · 5F2A | Country and currency | 0840 USD with exponent 2 in the test profile. |
9F1B | Floor limit | Amounts under it can be approved offline with a TC; over it the TVR bit sends the transaction online. |
| TAC | Terminal action codes | Denial, Online and Default masks matched against the TVR during terminal action analysis. |
Risk & Behavior Tab
How the emulated card decides. Everything here changes what GENERATE AC returns, how the card treats PIN, counters and issuer scripts — and what goes wrong when you ask it to.
apdu-simulator · Risk & Behavior — cryptogram policy, PIN and counters, issuer authentication and the fault injection switches
9F14, 9F23).EXTERNAL AUTHENTICATE, accept or refuse issuer scripts (71 / 72), and optionally require a valid ARPC before returning a TC.GENERATE AC, or one corrupted cryptogram byte — to see how the terminal copes.Test Plans Tab
A test plan is a scripted sequence of APDUs with the status word and data each step must return. Plans are stored with the profile and run from the session window, step by step or end to end.
apdu-simulator · Test Plans — the built-in plans and the steps of the online ARQC purchase passing one by one
- Step — a command by name or raw hex, with the fields the simulator fills at run time — amount, date, unpredictable number.
- Expect SW — the status word the step must return; anything else fails the plan at that step.
- Expect data — a tag that must be present, or a tag with an exact value —
82 = 18 00,9F27 = 80. - Report — each run ends in a pass / fail line per step with timing, and feeds the L3 Report tab.
The Session Window
Launch APDU Simulator opens the session window for the profile. Seven tabs, all live:
| Tab | What it does |
|---|---|
| Card Session | The live exchange. In loopback and reader modes it is active — a quick-action toolbar, a raw APDU composer, and the last exchange split into formatted and raw command and response. In card-emulator mode it is passive: the external terminal drives and Studio answers, so there is no composer. |
| Trace Log | Every exchange as a log entry, with the same filter, auto-scroll and stats chrome as the other simulators. A non-9000 status word is coloured as an error. |
| Test Plans | Pick a built-in plan, run it through the connected transport, see pass/fail per case, export the report in the scheme’s preferred format. |
| Wire Sniff | Imports a sigrok .sr or CSV capture from a 24 MHz logic analyzer and lines it up against the exchange log, so you can confirm the firmware emitted on I/O, CLK, RST and VCC what the runtime says it sent. |
| L3 Report | Generates a certified-format report from the most recent test-plan run. |
| Firmware | Builds and flashes the stm32-card firmware, with the build log in the shared log panel. |
| Settings | A live view of how the running simulator is wired. Changing anything means going back to the configuration screen. |
apdu-simulator · Trace Log — the seven exchanges of a contact purchase arriving in order, with the L2 phases ticking off above them
apdu-simulator · Wire Sniff — the USB-CDC link frame by frame — hello, ATR, reset, then every C-APDU in and R-APDU out with sizes and timing
apdu-simulator · L3 Report — the ten checks of the last transaction, eight passed, offline data authentication skipped and online processing noted
apdu-simulator · Firmware — the NUCLEO-L432KC board, its pinboard map, and a firmware update flashed and verified from Studio
Card Session status strip
| Field | What it shows |
|---|---|
| Status | Idle, or connected and exchanging. |
| Phase | Which part of the EMV flow the session has reached. |
| Last AID | The application most recently selected. |
| Exchanges | How many command/response pairs this session has carried. |
Common Status Words
| SW1 SW2 | Meaning |
|---|---|
9000 | Success. |
61xx | Response available; xx bytes remain. Issue GET RESPONSE. |
6Cxx | Wrong Le; correct Le is xx. |
6300 | Authentication failed (PIN verification with no retry counter). |
63Cx | PIN verification failed; x tries remaining. |
6700 | Wrong length. |
6982 | Security status not satisfied. |
6985 | Conditions of use not satisfied. |
6A82 | File or application not found. |
6A86 | Incorrect P1 / P2. |
6D00 | Instruction code not supported. |
6E00 | Class not supported. |
Tips & Troubleshooting
- No serial port listed — The firmware has to boot before the device appears. Wait for
/dev/cu.usbmodemXXXX, then press Rescan. - No PC/SC readers detected — Check the PC/SC service is running and no other smartcard application is holding the reader exclusively.
- ATR mismatch — Some terminals validate the ATR against a list. Set an ATR override on Mode & Transport to match the card you are impersonating.
- Terminal times out — A passive session answers as fast as the firmware relays it; if the terminal still gives up, check the wire capture rather than the runtime.
- Plan passes in loopback but fails on hardware — Loopback and the hardware modes share the EMV runtime, so the difference is on the wire. Wire Sniff is the tab for that.
Try it on your own cards
Free and open source. Download the studio and run this simulator on your desk in minutes.
Testing with a team, or certifying with a scheme? Pro raises the CPS ceiling, unlocks the full algorithm set and deep simulator tweaks, plus hosted endpoints and priority support.
Register for Pro